

Rockwall Youth Fair Photos - Galleries are Ready!
All of the photos for the Rockwall county show are ready!
Thank you all so much for your patience! We’ve worked through all of the images and we are happy to announce that all of the images are processed and ready to view!
The images are sorted into two different galleries. There’s a Backdrop & Buyers gallery as well as a Ring Photos gallery. The Ring Photos gallery is sorted by animal, there are different categories for broilers, swine, cattle, lambs, goats, rabbits, and separate categories for weigh-in photos and sale photos.
** PLEASE TAKE NOTE**
Orders from the two galleries cannot be combined. You will have to select the images you want in one gallery and then check-out and repeat the process for the next gallery. If you are ordering prints, you will have to pay for shipping twice. We understand this is a pain, but there is unfortunately no way around this because of the different pricing and technical requirements needed for each different set of images.
We have lowered our pricing however to give you the best possible deal on print purchases. And while you are having to pay for shipping twice, the photos are printed in a professional lab with very high quality photo paper (no ink-jet printers used here). You are getting a tremendous value, even with the extra shipping costs.
It’s been a pleasure to work with all of you and your students! We are a local photography group and always look forward to working with and supporting amazing organizations like the Youth Fair, Rockwall FFA, and Rockwall 4H. Don’t forget to like our Facebook Page and follow us on Instagram to stay up to date on news and receive some great offers on photography for you and your family!

The Canon EOS 1N
If you’re considering picking up a Canon EOS 1N - this is a great camera to work with!
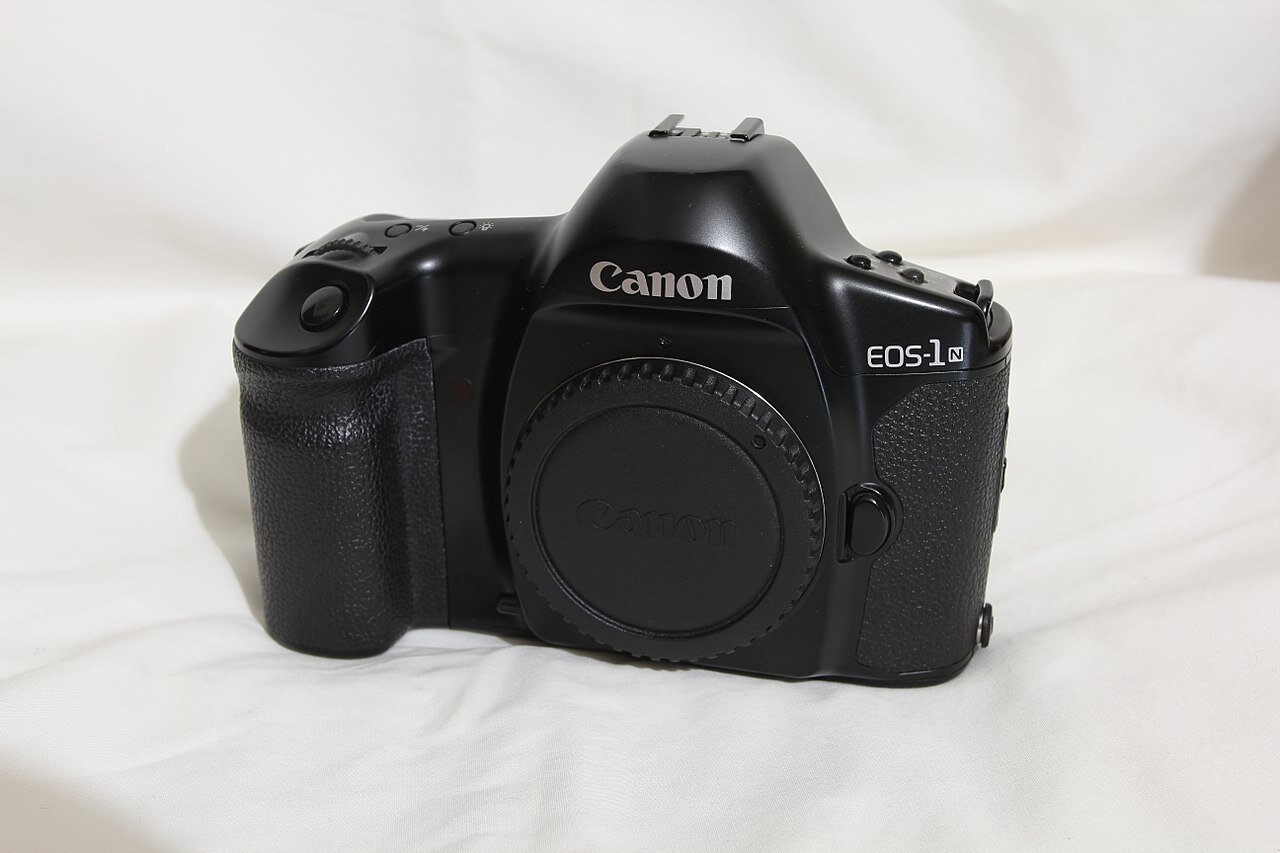
The Canon EOS 1N
I own quite a few film canon film cameras. I enjoy using all of them from time to time, but the Canon 35mm film camera that I used the most is the EOS 1N. The familiar layout combined with the fact it uses all of the lenses I already own make it the camera I reach for first whenever I go out. If you’re considering getting into film or stepping up from an older Canon AE-1, then this is definitely the camera for you!
Canon EOS 1N Questions
If you’re considering a 1N, then you might have some questions. I’m going to start with a few common questions to hopefully help you find the information you’re looking for.
What kind of film does the Canon EOS 1N use?
The 1N is a 35mm film camera and can use ALL 35mm films in a standard film cartridge. Color, black and white, and specialty stocks all work great with this camera. Certain films might not have the ISO data encoded into the film and therefore you might have to set the ISO manually, but the film will still work fine in the camera.
What kind of lenses does the Canon EOS 1N use?
The 1N uses Canon’s very popular EF-mount. EF lenses are still in production and there is an abundance of used lenses out there on the market. Beside the option to buy new or used lenses, EF lenses from Canon also come in a broad range of focal lengths, prime and telephoto, as well as a broad range of glass quality from some very basic beginner lenses all the way up to their L-series glass which boasts some of the most beautiful optics in photography.
What kind of batteries does the Canon EOS 1N use?
The Canon EOS 1N body uses a 2CR5 battery. These batteries are available locally at battery and electronics stores and also available on Amazon. I’ve used the Panasonic 2CR5 as well as the Energizer 2CR5 and have had good results from both.
If you get a 1N with the optional BP-E1 battery pack then you could simply load AA batteries. These battery packs are no longer produced but if you can pick up a used one its a simple addition to your Canon 1N SLR.
Can I use a flash with the Canon EOS 1N?
Yes! All of the Canon branded flashes work great with the 1N. There are also several non-Canon flashes that work great with the camera and are much more affordable. You can pick up an older used flash or buy a brand-new one. The 1N utilizes TTL to help you get a better result while using a flash. I personally recommend the Canon Speedlight 600EX II-RT. It’s a little bit pricey, but the features and build quality make it totally worth the price!
Does the Canon EOS 1N have autofocus?
Yes! It features a 5-zone autofocus utilizing TTL phase detections. The focus zones consist of a series of five little boxes that are placed across the middle of the image. You select with zone you want to use and then place and half-press to focus. The autofocus is a little slow compared to more modern cameras, but it is accurate.
How much does the Canon 1N cost?
You can expect to pay between $100 to $350 for a used Canon 1N according to my research looking at Ebay, Facebook Marketplace, and a few used camera dealers. The condition of the camera affects the pricing the most.
Canon EOS 1N Review
I bought this camera as a compromise. I actually wanted a Canon EOS 1V, but the prices of the 1V were outside of my budget. I spent quite a bit of time looking at used camera sites and Ebay before I finally found a camera that was in good shape at a decent price. While I generally do love the camera, it does have a few issues. Here’s a breakdown of the pros and cons of the Canon EOS 1N:
Pros
Familiar form factor with other Canon SLR/DSLR bodies
Popular lens-mount (Canon EF)
Availability of both new and used lenses
Modern features like autofocus and TTL flash
Auto-winding film
Rugged design
Cons
Batteries are a little inconvenient to find sometimes
Battery has some connectivity issues (I have had to recently insert a piece of tape to keep the battery pressed against the contacts)
There’s a common issues with the shutter becoming stuck and not cycling, but is easy to fix (has only happened to me once when I first got the camera)
Focus is limited to only 5 zones and is a little slow (great for portraits, not so great for events…)
Should You Buy the Canon EOS 1N?

Absolutely! If you’ve already invested in the Canon eco-system, you can pick up a body and use all of your existing accessories, which is a huge win. If you’re just getting started but know you want to live in the Canon eco-system then anything you buy will work on all of the existing Canon equipment (with the exception of the newest mirrorless devices that use the new RF lenses). Also, if you’re interested in getting into film but don’t want to go the fully manual route that many of the older 35mm SLRs require you to take, then the 1N is a great camera at a great price-point that offers enough modern features to get you started. Just rotate the mode selection into P for Program and shoot away and you’ll get great results almost every time!
There are a lot of great features and specific settings that can help you get a lot out of the 1N - but honestly, I don’t use most of them. I mainly use mine for shooting 35mm film at weddings and special events when I need the speed of autofocus and the ability to use the lenses I already have with me. When I get an opportunity, I will also be picking up and Canon EOS 1V and will more than likely retire this camera. But its still a great workhorse and is dependable in spite of its age!

If you need more information, make sure and download the user manual below! It’s got everything you need to know about using the camera on a daily basis!
Check our Online Store for the Canon 1N
We occasionally carry these in our online store! Click here to see if we have any in stock!
Recommend Films to use with the Canon EOS 1N
If you’re a beginner, here’s some links to some great film to get you started with your Canon 1N.

Rockwall Youth Fair Photos - Update #2
A quick update for everyone from the Rockwall Youth Fair Livestock Show!
Rockwall Youth Fair Livestock Photos - Update #2
I can’t believe it’s already been a week since the live stock show started! This time last week we were photographing lambs, goats, chickens, and rabbits in the show ring! Since then, we’ve been busy sorting, editing, and uploading photos. We’ve divided the images into two different groups and are working them separately. Here’s an update on both!
Backdrop and Buyer Photos
We’ve sorted and edited all of the backdrop photos from both Friday night and Saturday. We’ve also sorted through all of the photos taken with the buyers. All of these images have been uploaded to our online gallery. You can click the link below to check out that gallery, browse the images, buy prints or purchase the digital downloads to make your own prints. So as of today (Friday), all of the backdrop and buyer photos are done and uploaded!
Ring Photos
We are still sorting and editing all of the ring photos. There are a significantly larger number of those images, so it will take a little longer to work through them. Once they are all edited, we will get those uploaded to the online gallery. Right now, it is probably going to be Sunday evening before these images are finished and uploaded. If you would like to be notified as soon as the images are ready - click the button below to sign-up for our email list. If you’ve already signed up for the list and received the email about the backdrop and buyer photos, you do not need to sign up again.
Please feel free to share this post so everyone can stay updated!
We have had so much fun getting to work with all of you and your students! We do a lot of livestock events and Rockwall Youth Fair Livestock show has been one of our absolute favorite experiences ever! As crazy as things are these days, its refreshing to see a community of families, friends, and neighbors come together do something as amazing as y’alls show this year! Thanks so much for allowing us to be a part of all of the awesome things y’all are doing!
Now, I’ve got to get back to working on these photos!

Where to Buy Polaroid Film
You’ve got your polaroid camera, you’re feeling inspired and ready to go out and take some photos and live in all the glory that is the instant photo life, except that you don’t have any film…
Where to Buy Polaroid Film
I go through A LOT of polaroid film. And I’ve bought it from every place you can imagine trying to get the best deal, or the newest batches, or just find availability. Today’s post is a quick guide to help you find the film you need to keep your camera loaded and keep shooting!
Buy Polaroid Film Online
This is a great place to start and you can find some really good deals if you look hard enough. There are actually a lot of retailers that sell the film online so you’ll have lots of choices in products and prices. Shopping online gives you the ability to compare and get a feel for what all is out there!
Buy Polaroid Film from Amazon.com
This is the first place a lot of people go, especially if you’re an Amazing Prime member. If you just search for Polaroid Film on Amazon, you’re going to get a lot of different products pop-up, including Polaroid Papers, Instax, and others. But as you sort through, you’ll be able to find a lot of good deals!. Amazon does have some of the best pricing and carries multi-packs which aren’t easy to find in stores. Prices on amazon range from $15.99 for a single pack to around $70 for a five pack.
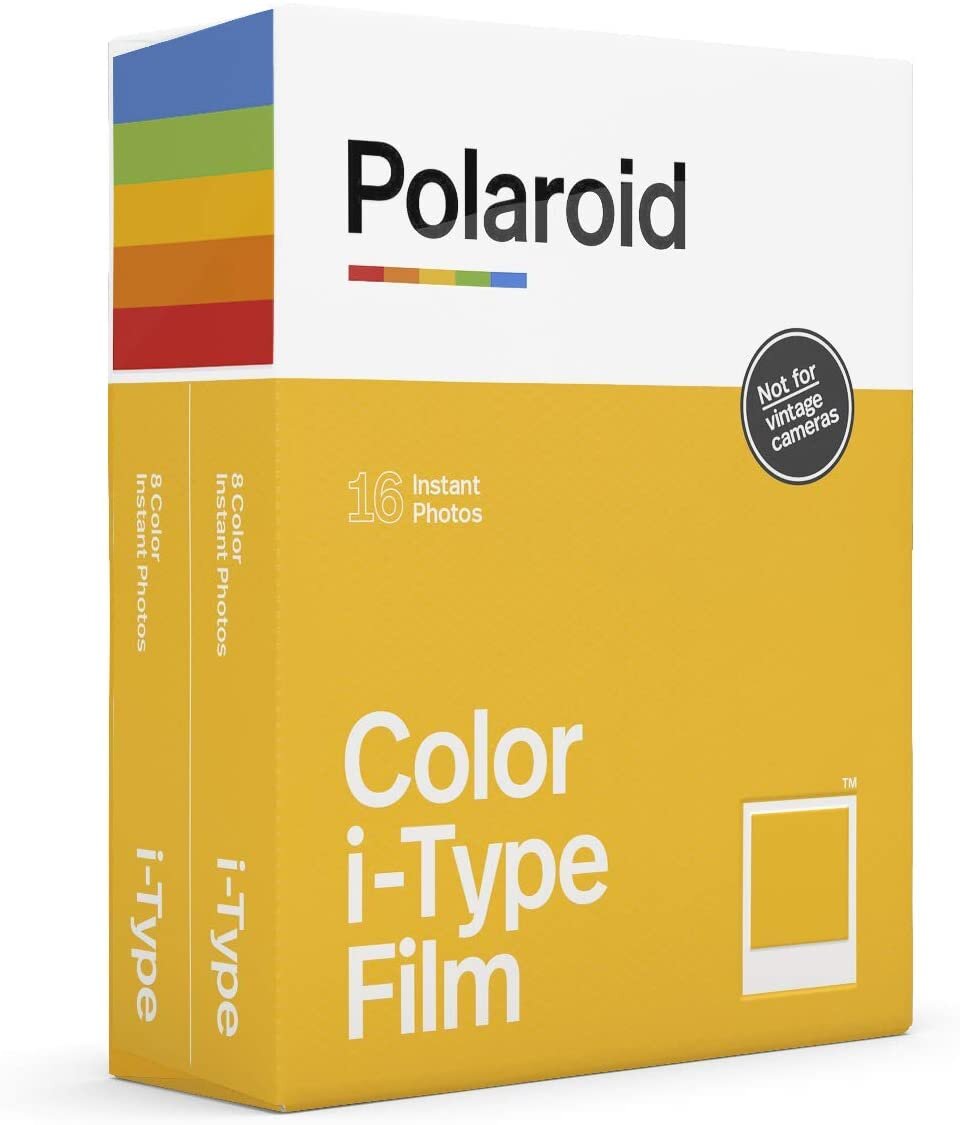
If you’ve got an I-Type camera (which is all of the newer/modern Polaroid cameras), here’s a great deal on a two-pack for only $29.19!
A bit of warning however, the film you might purchase from Amazon might be older stock that’s been sitting around for a while. With Polaroid film, I have found that the fresher (newer) the film, the better the results. If you’re just getting started with Polaroid, you won’t notice a difference. But if you’re going for higher quality and very specific results, you might not get the freshest batches.
Buy Polaroid Film from Polaroid.com
Getting the film directly from the manufacturer definitely has a lot of benefits. When I have ordered my Polaroid film directly from Polaroid.com, I’ve gotten amazing customer service and the freshest stock of film. They also have a lot of variety in their film offerings, a lot of different combo packs, and occasionally some specialty framed films that are a lot of fun to pick-up. I love getting film directly from Polaroid!
There are a few downsides however. Polaroid.com does not give you an opportunity to get discounted prices, BUT, they are often the exact same price as most retailers! I-Type Film from Polaroid.com comes in at $15.99 plus shipping. The other downside is that shipping can take a little while. It isn’t slow, every just takes the normal few days to arrive.
I normally order from Polaroid.com if I’m wanting the freshest possible film stock for my project. I’ve been a customer of theirs for years (since way back in the Impossible Project days), and I still buy from them on a regular basis. Also, you’re needing SX-70 film, Polaroid.com is probably going to be your best bet. It’s not in stock in any local stores and sometimes its a little hard to find on Amazon.
Buy Polaroid Film In Stores
While many of my projects are using polaroid instant film are planned in advance, there are many times when I’m using the film personally and I find that I’ve ran out. Now, there are several retailers that carry the film IN STORES!!! While several stores do carry the film, I’m only going to talk about the top three that I use on a regular basis.
Buy Polaroid Film at BestBuy
All of the BestBuy locations near me carry the film, in both I-Type and 600. BestBuy even carries multipacks if you’ve needed a whole lot of film. But in my experience, BestBuy usually has some of the oldest film packs out there. I’m not sure why, but most of the manufacture dates on packs at BestBuy are a year or more old. I’ve picked up a lot of film from them, and its competitively priced, but if its for a professional project, I generally steer clear.
Buy Polaroid Film at Target
Target stores usually have a pretty great selection of film also. But, there’s a very special reason why I stop in all of my local Targets and check out their film; Target stores will very often put Polaroid Film on sale at a discount! I’ve picked up older packs of film that haven’t sold for as little as $2.99! Most of the time, the discount isn’t that substantial, but any discount helps! Even if the film isn’t on sale, I still end up picking-up a pack or two. I mean I’m already in the store, standing in the photo section, looking at the film… I might as well buy some!
Buy Polaroid film at Wal-Mart
We get everything else there, why not get my Polaroid Film there too! Walmart’s selection is definitely the least of the in store options and they don’t really ever discount the film. Walmart gets a mention in my post today because of the convenience factor. The film is always older stock but its available when I need it. Well at least a couple of packs are. What I have found is that most stores only have two to eight packs available, so if you’re needing more you might not be in luck if you run to the Wal-Mart.
Cheap Polaroid Film
At around $16 per pack and only 8 shots per pack, $2 per phot isn’t cheap! The prices have come down over the years but getting good with your polaroid takes practice and at $2 per practice shot, you don’t want to waste a lot of film.
So where can you find cheap polaroid film - online or in stores? I would check places like Ebay.com and scroll through a lot of Amazon. I’ve found film and used cameras on Craigstlist and even Facebook. People are often getting rid of their cameras and film and you can find some really great deals in the used but never opened market.
If you’re looking in stores, I honestly have only ever found cheap polaroid film in Target stores because they discount theirs more often than anyone else. But other stores sell the film besides the three I listed. If you go into a store, check to see if they have stock and then keep an eye on their discount bins! As the film ages and new stock comes in, stores often will move their older film to the discount bins!
Conclusion
The good news is that you’ve got a lot of options! The even better news is that once you have the film you’re going to love working with it. Here’s my final breakdown on where to purchase Polaroid Film :
Amazon - Fast shipping, great price but might get older stocks
Polaroid - Slower shipping, comparable price, but will get newer/fresher film packs
Best Buy - Local pick-up, comparable price, will get older film
Target - Local pick-up, comparable to very discounted prices, film seems to be a decent age to maybe a little older
Walmart - Local pick-up at almost every location, comparable price, you will get older film.
I hope that helps you in your search for Polaroid Film! If you’re new to Polaroid and instant photography and would like a little more advice about what cameras and films to buy, check out my other blog post by CLICKING HERE!

Rockwall Youth Fair Photos - Update #1
If you’re looking for updates on the photos from the Rockwall Youth Fair - you’ve come to the right place!
Livestock Show Photos are in Work!

We had an amazing this past weekend working with the wonderful students, parents, ag teachers, and community members at the Rockwall Youth Fair out at the Rockwall County Courthouse grounds. It was an awesome experience for us and we were so thankful to have gotten a chance to be a part of this year’s livestock show!
We are in the process of reviewing and editing pictures now. There were almost 2,000 photos taken, all of which have to be looked at and edited. But the good news is that we are working through them pretty quickly.
All of the backdrop photos should be uploaded by Thursday! We will post a link to that gallery as soon as the uploads finish and will be sharing the link with the show board so that they can help get it out to everyone.
The ring photos should be finished up by this Saturday at the latest! Ring photos and backdrop photos will be sorted into two different galleries. We will be sharing the links to both as soon as they galleries are up!
Click the button below to be notified when galleries are all ready. You’ll receive a link sent directly to you inbox - that way you don’t have to keep checking our website for updates!

Avoiding a Wedding Disaster - How to Prepare for the Family and Friends Photos at Your Wedding!
Wedding group photos often turn into a disastrous mess. Check out these tips to be better organized and to help your big day flow smoothly!
The BIG DAY is finally here and just like that you’ve vowed, ringed, kissed, and been pronounced. As you march down the aisle with your brand new spouse, you finally feel like you can relax and enjoy the rest of day. Its a moment of absolute bliss and as rest of the stress melts away and is just replaced by an overwhelming tidal wave of love and joy.
And then you are called back, its time for family and friend group photos. As a photographer, I’ve seen this go very very smoothly and quickly. But I’ve also seen it go very very badly, frustrating the bride and groom, the wedding party, and well, basically both of your families. Today, I want to talk to you about a few ways you can be prepared for the group photos and can make them flow so quickly and smoothly.
Make a List, Check it Twice…
When a bride books with us, its always an exciting time! We talk a lot about colors and plans, I take a lot of notes to help me as the photographer be ready for the big day. And before we leave, I always give the brides I work with a homework assignment: Get me a list of every grouping you want, with names one week before the wedding. I cannot tell you how important this is. This list has made the post ceremony group photography go so much quicker. We can announce a list of names after the ceremony ends of people who need to stay and everyone is then dismissed to the reception. There’s no chasing people down and it gets all of the unnecessary people out of the way. We can also organize the shoot in a way to get the most people done as quickly as possible and get them on their way to the reception.
Without the list, its like trying to herd cats to get everyone in the photos. Well I think it actually might be worse than herding cats…
Here’s the process I advise the brides I work with to follow:
Step 1 - Start with the Guest List
As you build your guest list, begin marking guests that you would like to have in the family/friends photos. You’re already spending a ton of time on this list, might as well use it to help build the group photo list! If you’re using excel or google sheets, just add a column for “Pictures” and add a check-box. It helps because you can share the file with both of your mom’s and make sure everyone needs to be checked for pictures is checked. I’ve actually seen individuals get mad and leave the wedding because they weren’t thought of to be including in the wedding photos. Its an easy to make oversight but it is also something that is easily avoidable using this method.
Step 2 - Build your Photo Group List
This is something that will need to be easily shared with the photographer. I prefer to get the list in soft copy instead of a printed copy. I also don’t want a PDF. I need a file that I can copy and edit and rearrange. Microsoft Excel is great, Google Sheets is great, Apple Numbers, or basically any kind of spreadsheet software will work. Feel free to share this file also with family who can help you revise and edit the list. I would rather take too many pictures than leave someone out and offend them!
Step 3 - Add a Note in their Wedding Invitation
Let people know that you are planning on including them in the wedding family/friends group photos. A little slip of paper included in the wedding invitation is a great way. You can choose your own wording, but it needs to say something like “We would be honored to include you in family and friends photos, after the ceremony ends, please stay for the group photos. Tony, our photographer will be there to give you instructions and help get you in all the photos you need to be in… etc” Its a nice touch and helps to make more of your family to feel included.
Wait Until After the Photos to Get Drinks

Maybe they should have practiced this before the photo….
The stress of the moment has passed and almost everyone is ready to get a drink from the bar and relax a little. And there is absolutely nothing wrong with that. The problem we have ran into is that individuals run off to the bar to grab a drink and sometimes don’t make it back for a little while. Everyone has to stand around and wait. It gets annoying. It doesn’t really annoy me, I’m gonna be there for the whole thing no matter what, but family and friends waiting to get the reception going often get hungry and some people will even leave if they have to wait too long. We want to keep things moving along so people don’t have an unpleasant experience at your big day!
Also, this has happened a lot - people tend to spill the drinks. On themselves. And the people standing around them. It can end up being kind of a big mess. And takes a lot of photoshop to fix later.
Get Ready to Stand in One Spot and Smile A LOT!

You should never let the Best Man carry the cake…
Generally, we try to place the bride and then to allow everyone else to move in and out of the photos. You are the centerpiece of almost every photo and moving your dress and accessories around can sometimes be very time consuming. It also helps us to make sure that everyone is centered for each photo. It is very tiring, especially after everything you’ve been through during the day. But standing in one spot and keeping that smile up with help the process go faster.
A lot of people from your family are going to want to hug you, and that is perfectly ok. Just let them come to you, that way we don’t have to reset your dress or reposition you.
Don’t be Afraid to Call an Audible!
The list we created is a tool to help us be organized and make things flow smoother. But it is not the LAW! If you want to add another grouping, or change it up or do something a little different - GO FOR IT! We are here to photograph you and to capture memories of your day. We can stop at any time and do whatever you want to do. During this whole process, we aren’t trying to limit the photos we take, we are just trying to limit the amount of time that is wasted by standing around and trying to figure out where Uncle Billy disappeared to because he needs to be in this next photo.

Always check the weight limit of the dock you are standing on…
That’s a wrap!
Follow these steps and even with a larger wedding with lots of attendees and family, we should be able to work through all of your grouping photos within 20 to 30 minutes. To contrast, I have seen this take over an hour when no one is organized. Its honestly just painful for everyone.
There’s nothing as exciting as wrapping up the family and friend group photos and moving on the reception where the real fun can begin!
We are here to help you through every step of the planning process! We hope this guide gives you an idea of how to make your group and family photos flow smoothly on your wedding day! Our goal is to make your wedding day something that is fun and memorable and as stress free as possible. If you’d like to know more, click the button below to find out about our wedding packages and pricing as well as availability.

We're Heading Back into the Show Ring!!!
We’re heading out to shoot the Rockwall Youth Fair Livestock show and we’re excited!!!
The great thing about photography is that there’s always a new experience with every different type of event. From senior pictures to roller derby, there’s always something fun to do!
One of the things that I absolute LOVE doing is livestock photographer at FFA and 4H livestock shows. There’s so much motion and energy and excitement from the students and their families. The energy is just contagious!
If you’ve never been to a livestock show, you should go. Students often spend months preparing their projects for the show ring. They feed, water, love, and exercise their show animals and work on their ag mech projects daily for long periods of time investing money and effort and emotion into what they are doing. It is an exciting thing to see what students who put their mind to something can do! And those students are supported by some amazing families, ag teachers, sponsors, and county agents to help them and teach them a little about being successful with a show animal and a lot about being successful in life. Its an amazing experience and its a lot of fun! If you have an opportunity, you need to make a time to go check out one of these shows!
As a photographer, I have found that there is no more of a friendly or obliging environment as a livestock show. The students are respectful and helpful. The parents and ag teachers are too. Its a culture of mutual support. Everyone is working together for a common goal, to help students learn and grow and achieve! And the students do achieve. It’s amazing to watch them work. It’s amazing to be able to photograph them as the move their animals, present them to the judges, love on them and calm them in an event that is stressful for both the student and animal. The competition is fierce, you can see it in the faces of each student in every photograph. But when the judge makes his decision, that fierce look melts into one of contentment and success, regardless of if they won the buckle or not.
This week, we will be working at the Youth Fair of Rockwall Livestock Show and we couldn’t be more happy. The Show Board there has been so easy to work with and I’m excited to get to work with some of these students and their families. We will get to meet some new people and make some new friends for sure!
If you’re gonna be heading to the show, we will see you there! If not, you can check out all of the great pictures here on our site as well as on our Facebook page!

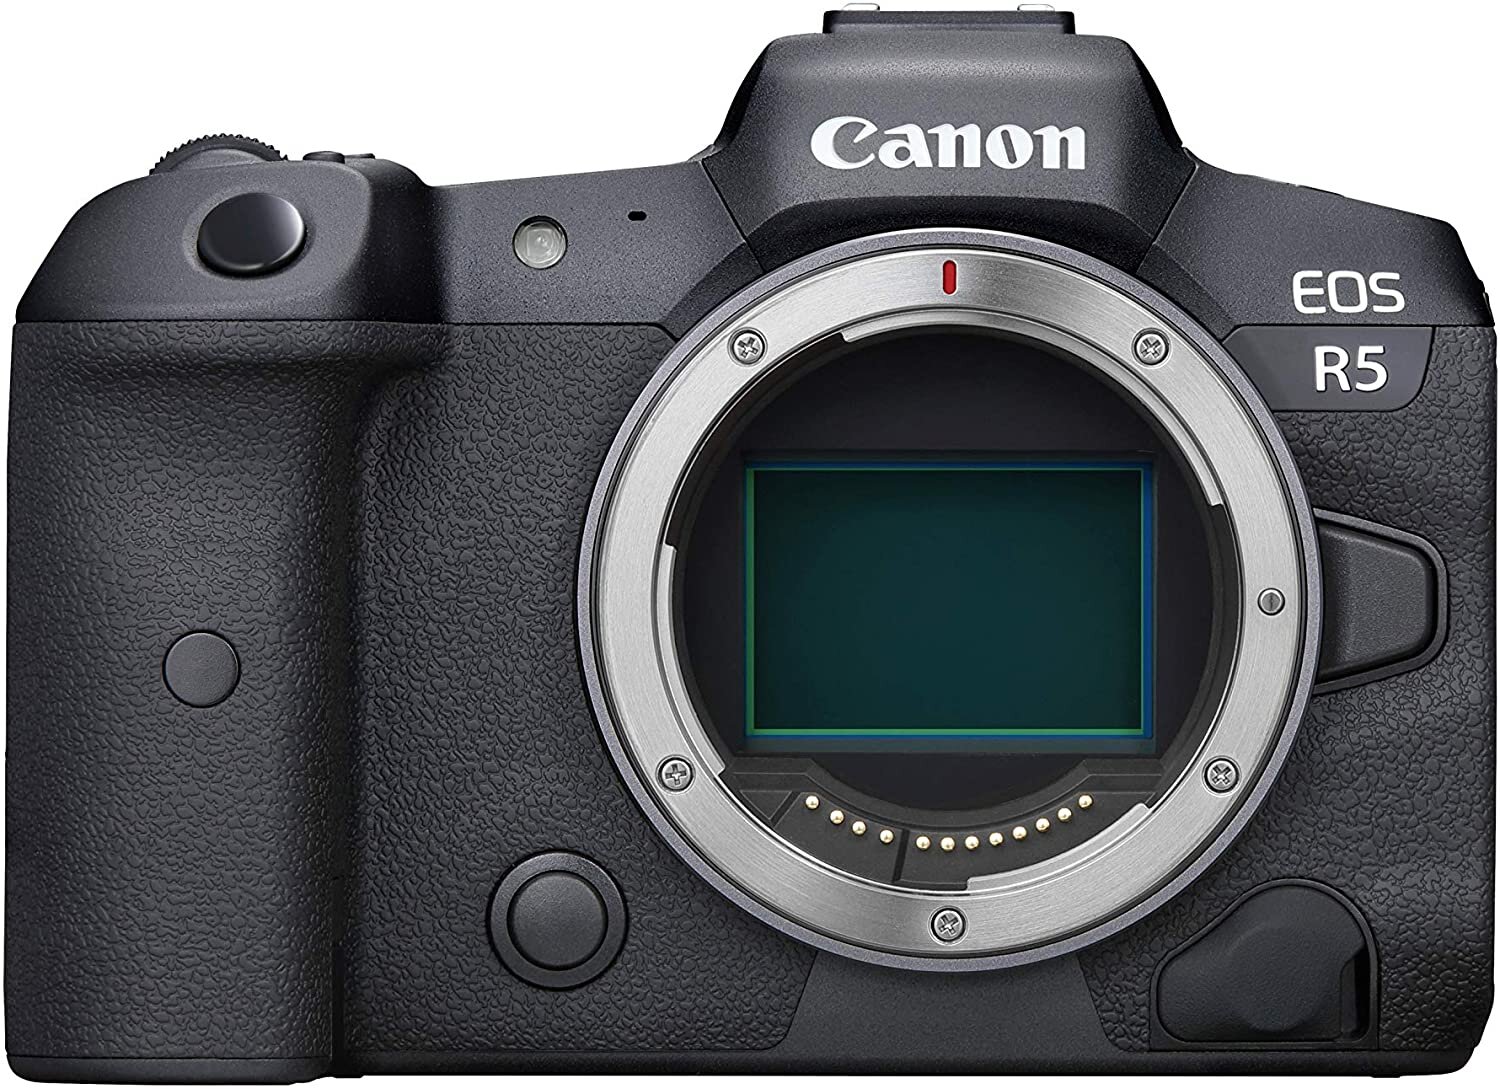
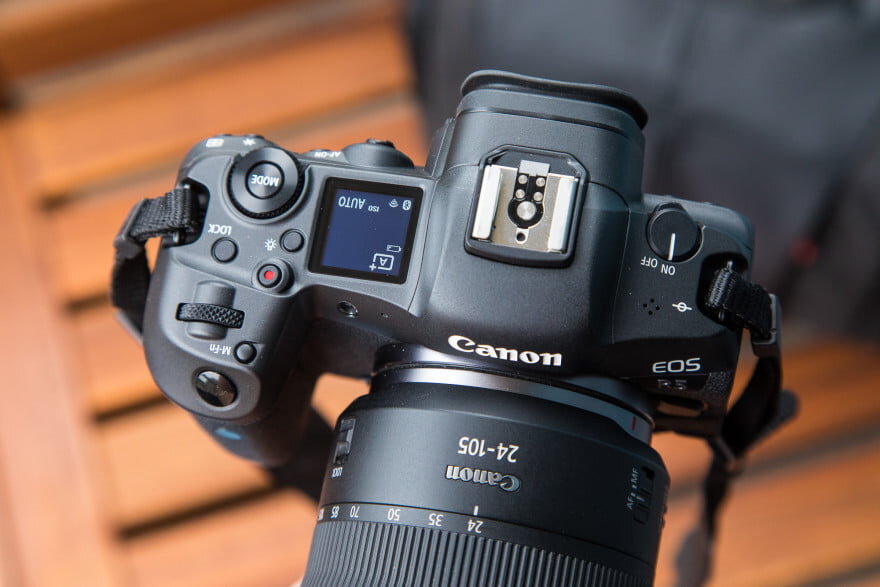
The Canon R5 Mirrorless Digital - 6 Months Review
There was a lot of hype about the Canon R5 when it released, but how has the camera held up during its first 6 months of professional use?
Back in 2020 when Canon finally announced the R5 and released the specs, it seemed like the perfect solution for me. I had been photographing weddings and events in low lights with my DSLR and to be honest, I was really tired of the focus struggle. I got a lot of really great shots that I had to just throw away because my Canon 5D Mark III just couldn’t find the subject to focus in time. Even in bright daylight, like when the bride was walking down the aisle it struggled to keep an accurate focus. It was frustrating.
To be honest, I hated mirrorless cameras. at my teaching job, we had a lot of Panasonic GH5’s and I just wasn’t a fan of the format. I hated, absolutely hated the EVF. The Panasonics were often buggy (they were school cameras so I’m sure the students had a lot to do with that). I had an opportunity to use a few Sony mirrorless cameras as well and I just hated the menu systems and the layouts. I loved my good ol’ Canon DSLR’s. I’d owned several of them and in spite of the flaws inherent to the DSLR, they were reliable and dependable and consistent and familiar. I knew what I was getting when I picked up my camera. And honestly, I was a little scared to drop the $3999 and make the switch to a whole new system.
First Impressions
So right out of the box, the Canon R5 was familiar, easy to set up and easy to use. It was an entirely new camera, but it was familiar. It’s like putting on a new pair of Chuck Taylor’s. They feel new, you know they are new, but they are just so so comfortable and familiar! The EVF is actually really amazing. It didn’t feel laggy at all. The focus system was easy to set up and seemed almost to be miraculous in how fast it could track and respond. My initial apprehensions melted almost instantly. I did have to buy new cards, which were kinda pricey. But there’s a good selection of CFExpress cards out there so I could make a choice from a selection. Of course, the R5 uses the new Canon RF glass, so that means a lot of new lenses were going to be needed. But I could worry about that later. I found a 24-105 RF for sale on craigslist, it was practically new and was at a really good price so I jumped on it to save myself a little money. That lens in the EF version had been a good lens for a lot of events I had worked so I was happy with it.
Time to Get to Work…
The first thing I shot with the camera was my son’s third birthday party. I used a Profoto A1X flash inside of our house and the results were good. I had to make a few changes to the settings as I wasn’t getting exactly what I wanted out of the camera. I did a family photography session the next week and got much better results. The auto eye focus was a huge pain in the butt for family group shots, so I had to change that for that shoot but the images turned out really great. One thing did pop out the more I used the camera; the skin tones were looking very much different and contained so much more data, I honestly was frustrated at first but I realized that I was going to have to up my lightroom/capture one game to get the most out of this camera.
Speaking of post production, the file sizes were huge. More space was required for each event’s photos and import and export times took a lot longer. But the images, the quality, and the details were amazing and crisp. It’s totally worth the extra time! In Lightroom and Capture One, I had to make a lot of adjustments to my work flow. I had been using my Canon 5d MkIII for so long correction and color were just like second nature. The colors that this sensor produces still fall into that beautiful Canon color space, but they are different. Different in a much better way, but different.
In the past 6 months I’ve shot several weddings and mini-sessions and events and I feel like I’ve really gotten a good feel for what this camera can do!
The Things I Don’t Like
Autofocus is like a million times better. But sometimes, all the technology gets in the way of getting the shot I want. I’m still tweaking settings and figuring things out, but there are still some times when I want the autofocus to do one thing and it does something completely different.
The paint on the body also seems to be a little thin. Or least not as resilient as other Canon bodies I’ve owned. I already have a couple of scratches in the paint from some very minor minor events. I was really really disappointed in that. I literally abused my 5dMKIII and have very few marks at all on it. My R5 is already marked up pretty good for a 6 month old camera.
Also, I might be inclined to complain about the battery life a little bit. I do not get as many shots out of each charge. Its not enough to really complain, but it is a noticeable difference. You are definitely going to need a couple of extra batteries if you’re going to be shooting all day.
The Things I DO Like
Literally everything else! The camera is amazing. The smaller form factor and decreased weight is amazing. The menus, easy of use, consistent performance, and the amazing autofocus make this camera worth every single penny. I’ve gone from have to cull about 1/3 of my shots for focus to having a hard time deciding which of the 10 perfectly focused images of the same thing I want to use. I had gotten into the habit of spamming the shutter button in low-light situations in the hopes of getting a good shot. Now I find that I have to calm my photographer anxiety and just take a couple of shots.
Conclusion (Plus I Should Mention the Video)
Overall, this camera was a definite win for me. This camera had gained quite a bit of notoriety because of the overheating issues, but I’ve used this camera to record lots of different things and haven’t had a single issue with over hearting. And the video quality is amazing. I was never impressed with the Canon 5d MKIII’s video quality. I didn’t want to upgrade the 5D MKIV just for the video, so having a DSLR that I can use for my primary shooter AND still be able to get some really great quality video with is a huge plus!
If you’re on the fence about switching to mirrorless, you can take a deep breath and take the plunge, Canon has delivered with a solid camera! The numerous benefits of the new system far outweighed the reasons I kept justifying my need to stay with the ol’ DSLR’s. I still used my old camera, and it still familiar and faithful, but now when I pick it up and use it, I find myself feeling limited in what I can do. The mirrorless camera is a fantastic improvement and is still in its infancy! As the format and technology grows, there’s no telling what future features may come out!
Buy one TODAY!
Amazon has a competitive deal on the R5. Click the link below to check it out. If the R5 is out of your prince range, you should definitely consider the Canon R6 and the Canon R. I’ve never actually shot with the R6, but its so closely related to the R5 I don’t feel like you will have much of a varied experience. I have shot with the R and can tell you it is a really great little camera. In fact, using the R was the last straw that convinced me to pre-order the Canon R5. Click the Amazon links below to check out those cameras as well!
If you’re interested, you can check out the Tech Specs for the camera below!
Type
Type
Image Processor
Compatible Lenses
Lens Mount
Image Sensor
Type
Effective Pixels Sensor Size
Pixel Size
Total Pixels
Aspect Ratio
Color Filter System Low Pass Filter
Digital single-lens non-reflex AF/AE camera DIGIC X
Canon RF lens group (excluding EF, EF-S and EF-M lenses)
When using Mount Adapter EF-EOS R: Canon EF or EF-S lenses (excluding EF-M lenses)
Canon RF mount
CMOS sensor (compatible with Dual Pixel CMOS AF) Approx. 45.0 megapixels
Approx. 36.0 x 24.0 mm
Approx. 4.40 μm square
Approx. 47.1 megapixels
3:2 (Horizontal: Vertical)
RGB primary color filters
Installed in front of the image sensor, non-detachable
Recording Media
CFexpress card
• Type B: Card slot
SD card
• SD card speed class-compatible.
• Compatible with UHS-II
• Eye-Fi cards and Multimedia cards (MMC) are not supported.
Dust Deletion Feature
(1) Self Cleaning Sensor Unit
• Removes dust adhering to the low-pass filter.
• At power off only / Enable / Disable. Performed automatically (taking about approx. 2 sec. as indi- cated on the screen) or manually (taking about approx. 8 sec. as indicated on the screen).
After manually activated cleaning, the camera will automatically restart (Power OFF to ON).
When [Multi Shot Noise Reduction], [Multiple exposures], or [HDR mode] is set, [Clean now] and
[Clean manually] cannot be selected.
(2) Dust Delete Data acquisition and appending• The coordinates of the dust adhering to the low-pass filter are detected by a test shot and appended to subsequent images.
The dust coordinate data appended to the image is used by the EOS Canon Digital Professional
Software (v. 4.14 and higher) to automatically erase the dust spots.
Not available with EF-S lenses, in cropped shooting or multi-exposure shooting.
(3) Manual cleaning (by hand)
1
Recording System
Recording Format Image Format
Compliant to Design rule for Camera File system 2.0 and Exif 2.3*. *Supports time difference information in Exif 2.31.
JPEG, HEIF, RAW (CR3, 14 bit RAW format), C-RAW (Canon original); Movies: ALL-I, IPB, RAW
HDR Mode- Continuous Shooting
(1) 1 shot only
(2) Continuously
(3) Multiple Exposure
Advanced shootingoperations
(1) Focus Bracketing (2) Interval Timer
(3) Bulb Timer
(4) Multi-Shot NR
File Size
3:2 Aspect Ratio Large/RAW/C-RAW: 8192 x 5464 Medium: 5808 x 3872
Small 1: 4176 x 2784
Small 2: 2400 x 1600
1.6x (Crop)*
Large/RAW/C-RAW: 5088 x 3392 Small 2: 2400 x 1600
4:3 Aspect Ratio
Large: 7280 x 5464 Medium: 5152 x 3872 Small 1: 3712 x 2784
Small 2: 2112 x 1600 RAW/C-RAW: 8192 x 5464
16:9 Aspect Ratio
Large: 8192 x 4608 Medium: 5808 x 3264 Small 1: 4176 x 2344
Small 2: 2400 x 1344 RAW/C-RAW: 8192 x 5464
1:1 Aspect Ratio
Large: 5456 x 5456 Medium: 3872 x 3872 Small 1: 2784 x 2784 Small 2: 1600 x 1600 RAW/C-RAW: 8192 x 5464
• Values for Recording Pixels are rounded to the nearest 100,000 or 10,000.
• For RAW and JPEG images, information outside the cropping area is not retained. • JPEG images are generated in the set aspect ratio.
• RAW images are generated in [3:2], and the set aspect ratio is appended.
* Indicate an inexact proportion.
2
File Numbering
The following file numbers can be set: 1. File numbering methods
a. Continuous numbering
i. The numbering of captured images continues even after you replace the card.
b. Auto reset
i. When you replace the card, the numbering will be reset to start from 0001. If the new SD
card already contains images, the numbering will continue from the last recorded image in
the card. 2. Manual reset
a. Resets the file number to 0001, and creates a new folder automatically.
* When manually resetting the file number, folders can also be renamed.
RAW + JPEG / HEIF Simultaneous Recording
Simultaneous recording of any combination of RAW/C-RAW and JPEG/HEIF image-recording quality is supported.
Color Space
Selectable between sRGB and Adobe RGB
Picture Style
(1) Auto
(2) Standard
(3) Portrait
(4) Landscape
(5) Fine Detail
(6) Neutral
(7) Faithful
(8) Monochrome
(9) User Defined 1–3
• In Scene Intelligent Auto, [Auto] will be set automatically. • [Standard] is the default setting for [User Def. 1–3].
White Balance
Settings
(1) Auto (Ambience priority/White priority) (2) Daylight
(3) Shade
(4) Cloudy*
(5) Tungsten light
(6) White fluorescent light (7) Flash
(8) Custom (Custom WB)
(9) Color temperature
* Effective also in twilight and sunset.
Auto White Balance
Type Coverage
Magnification / Angle of View
Eye Point
Dioptric Adjustment Range
Option between ambience priority and white priority settings.
OLED color electronic viewfinder; approx. 5.76 million dots resolution
Approx. 100% vertically and horizontally relative to the shooting image area (with image quality L, at approx. 23mm eyepoint).
Approx. 0.76x / Approx. 35.5 degrees (with 50mm lens at infinity, -1 m-1) Approx. 23mm (at -1 m-1 from the eyepiece lens end)
Approx. -4.0 to + 2.0 m-1 (dpt)
White Balance Shift
Blue/amber bias: ±9 levels
Magenta/green bias: ±9 levels
Corrected in reference to the current WB mode’s color temperature.
Viewfinder
3
Viewfinder Information
(1) Maximum burst
(2) Possible shots/Sec. until self-timer shoots
(3) Focus Bracketing/ Multiple-exposure/HDR shooting/Multi Shot Noise Reduction/Bulb time/Interval
timer
(4) Shooting mode
(5) AF method
(6) AF operation
(7) Image quality
(8) Card
(9) Drive mode
(10) Metering mode
(11) No. of remaining shots for focus bracketing, multiple exposures, or interval timer (12) Electronic level
(13) Movie recording time available
(14) Battery level
(15) Image Stabilizer (IS mode)
(16) Histogram (Brightness/RGB)
(17) Quick Control button
(18) Anti-flicker shooting
(19) White balance/White balance correction
(20) Picture style
(21) Auto Lighting Optimizer
(22) Still photo cropping / Aspect ratio
(23) AF point (1-point AF)
(24) AEB/FEB
(25) View Assist
(26) HDR PQ
(27) Flash ready / FE lock / High-speed sync
(28) Electronic shutter
(29) Touch shutter / Create folder
(30) AE lock
(31) Shutter speed / Multi-function lock warning
(32) Aperture value
(33) Wi-Fi® function
(34) Wi-Fi® signal strength
(35) Bluetooth® function
(36) Exposure simulation
(37) Magnify button
(38) ISO speed
(39) Highlight tone priority
(40) Exposure compensation
(41) Exposure level indicator
Autofocus
Focus Method Dual Pixel CMOS AF
Number of AF zonesavailable for Automatic Selection
AF area: Horizontal: Approx. 100% x Vertical: Approx. 100% Stills: Max. 1053 zones (39 x 27)
Movies: Max. 819 zones (39 x21)
AF Working Range
EV -6 to 20 (f/1.2 lens*, center AF point, One-Shot AF,at 73°F/23°C, ISO 100) * Except RF lenses with a Defocus Smoothing (DS) coating.
Focusing brightness range
(in movie recording)
8K: EV -3 to 20
4K / Full HD: EV -4 to 20
With an f/1.2 lens*, center AF point, One-Shot AF,at 73°F/23°C, ISO 100 * Except RF lenses with a Defocus Smoothing (DS) coating.
4
AF Methods
AF Method
Face+Tracking AF Spot AF
1-point AF
Expand AF Area
(Above, below, left and right/Around)
Zone AF
Large Zone AF: Vertical, Horizontal
Subject to Detect
People, Animals, No Priority
* Available with [AF method] set to Face+Tracking, Zone AF, or Large Zone AF (vertical/horizontal)
Exposure Control
Metering Modes
Real-time metering with image sensor (384 zones [24x16 zone metering]) (1) Evaluative metering (AF point-linked)
(2) Partial metering (approx. 6.1% of the area at the center of the screen) (3) Spot metering (approx. 3.1% of the area at the center of the screen) (4) Center-weighted average metering
Metering Range EV -3 – 20 (at 73°F/23°C, ISO 100) (Still Photo Shooting)
Exposure Control Modes
(1) Scene Intelligent Auto
(2) Flexible-priority AE (Fv)
(3) Program AE (P)
(4) Shutter-priority AE (Safety shift possible) (Tv) (5) Aperture-priority AE (Safety shift possible) (Av) (6) Manual exposure (M)
(7) Bulb
(8) Custom shooting mode C1, C2, C3

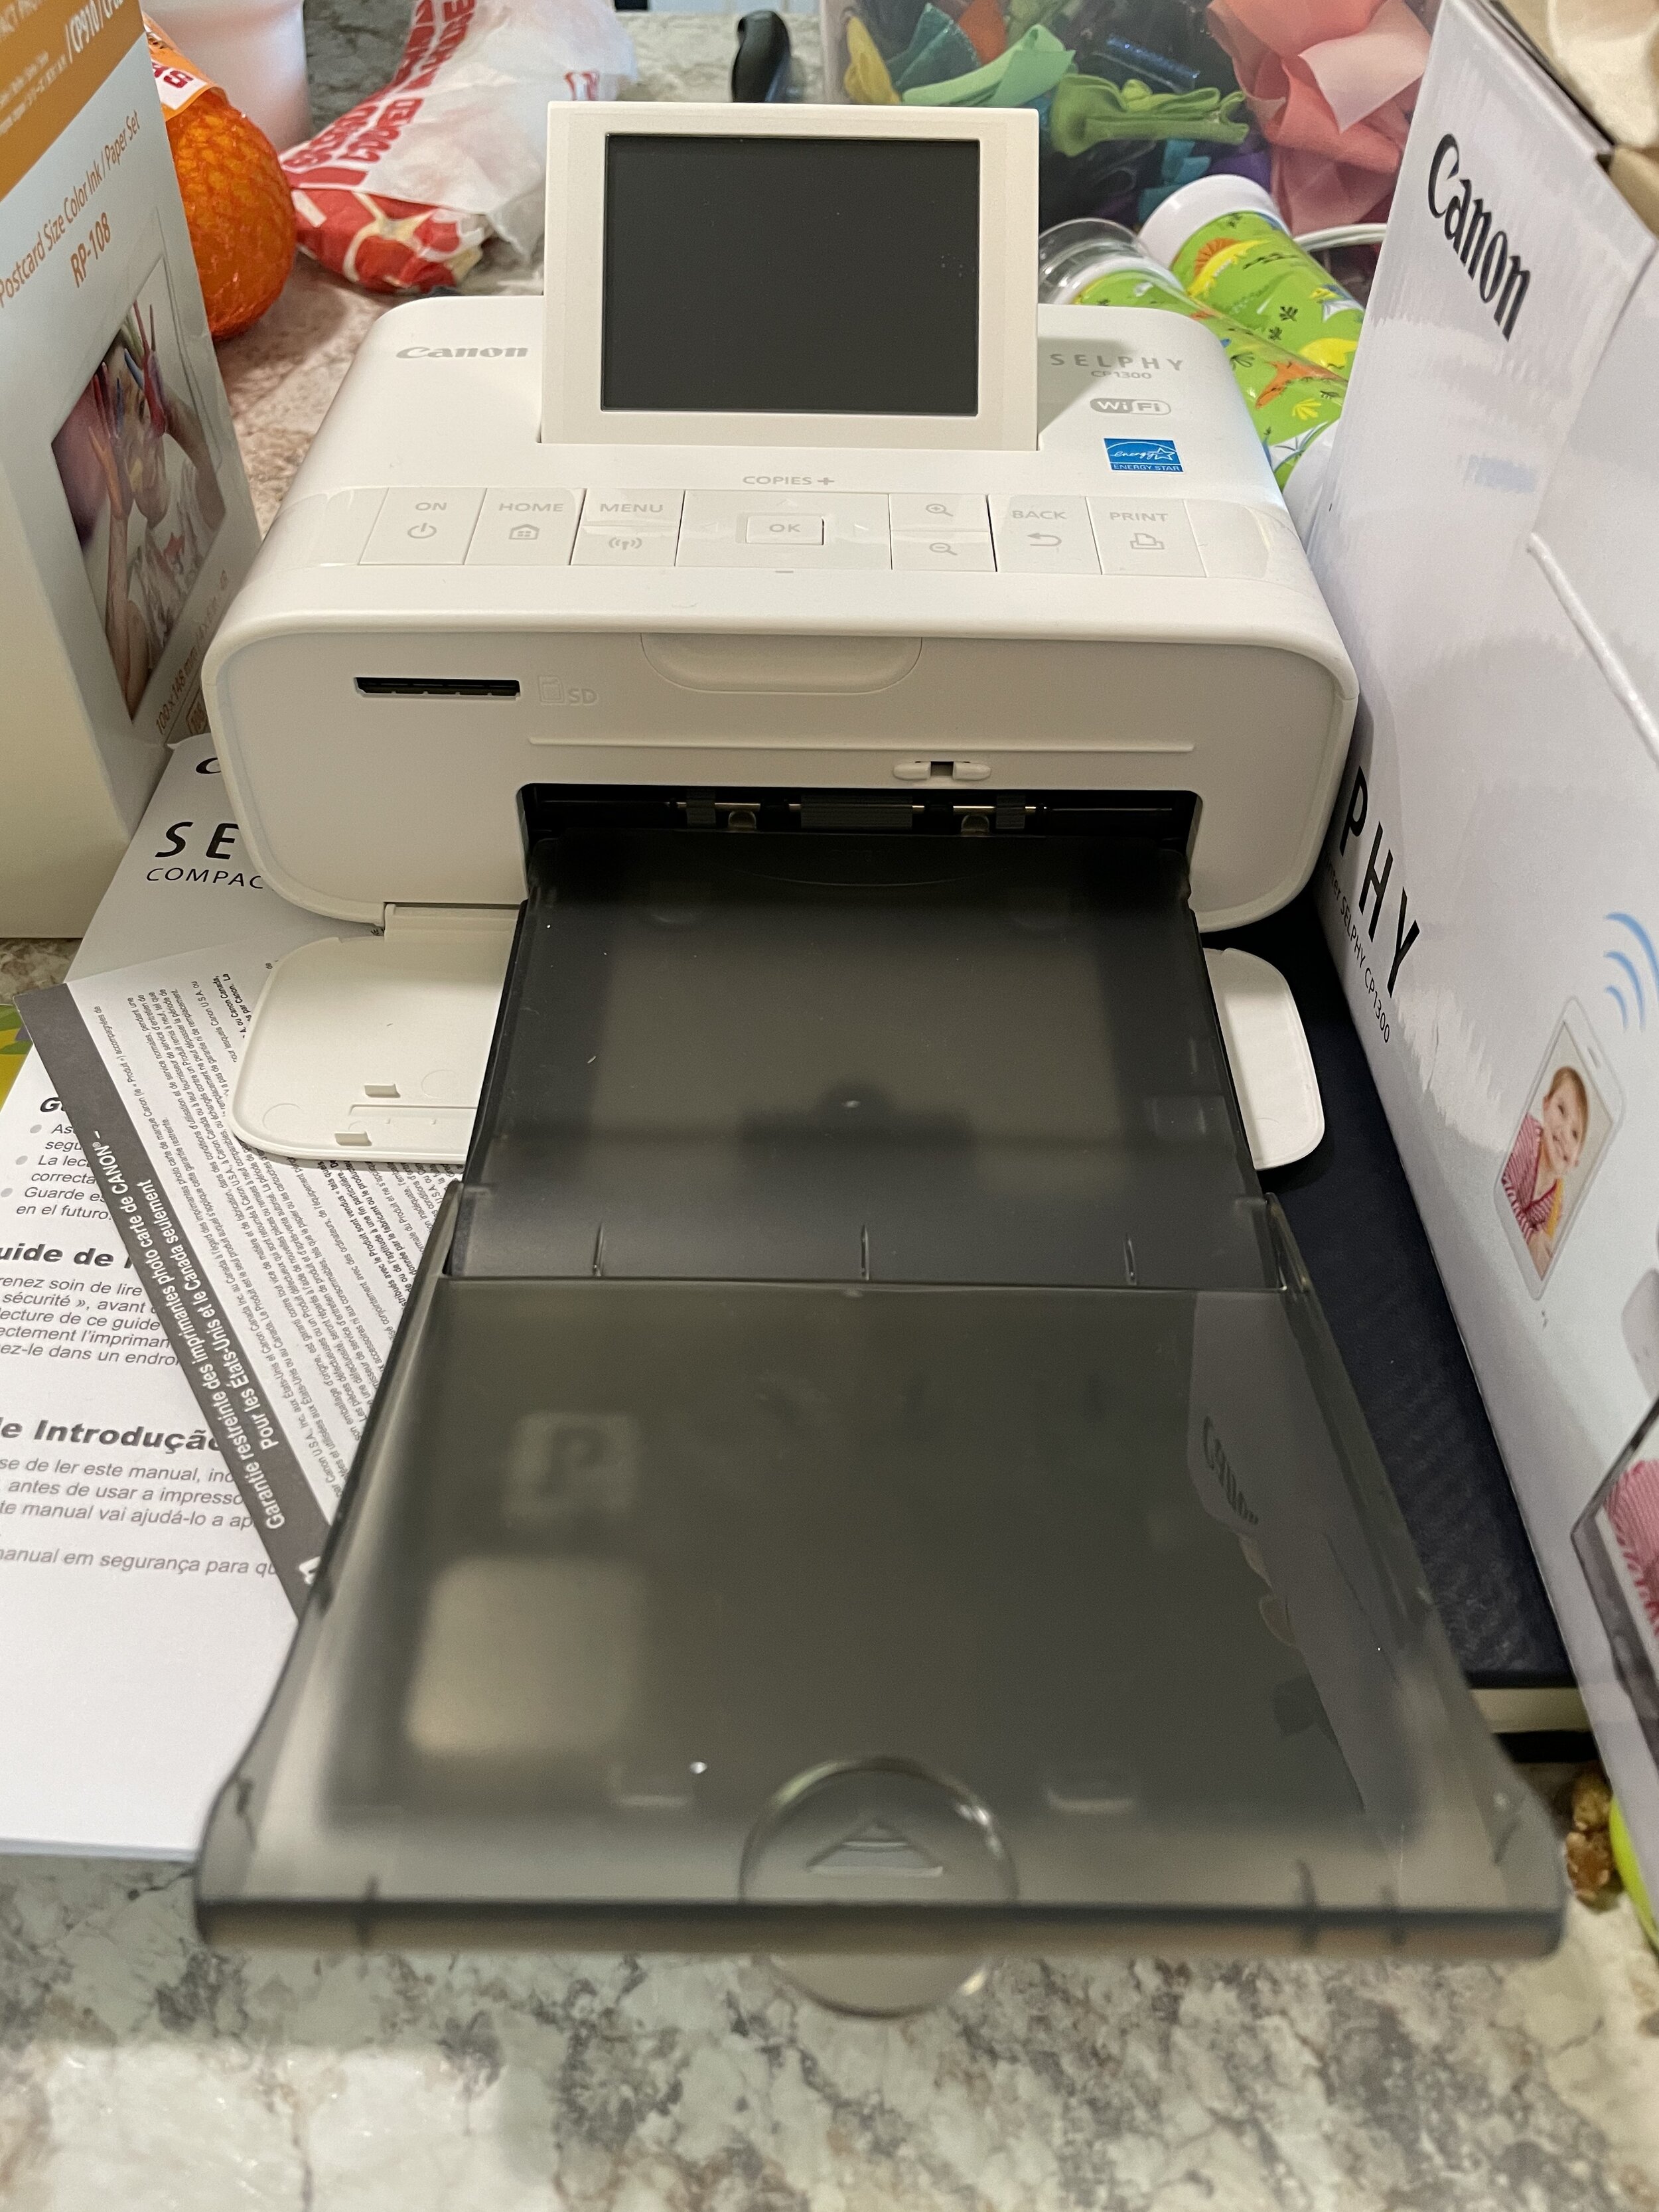
Product Review - The Canon Selphy CP1300
We needed a reliable and portable photo printer and decided to give the Canon Selphy CP1300 a try. Is it worth it? Read to find out!
I LOVE to print photos and I try my very best to always encourage everyone to print their images.
BUT…
The truth is, I hate printers. Especially photo printers. They never seem to live up to the hype or my expectations. And when I needed a small, compact, reliable photo printer for several events I was shooting, I became super critical and searched and read for days before making a decision. And then, I stressed about the printer I had picked…
The Canon Selphy CP1300 didn’t start off at the top of my list of printers I was interested in. In fact, I didn’t even know the thing existed when I started searching. But as I worked my way through available printers and features and thought about what I was needing, this little printer just kept rising to the top. And seriously, I tried to ignore it and dismiss it. But again and again, it just kept ending up in the top two or three printers I was considering.
The Selphy CP1300 is a very different printer than I have used in the past for photographs. For starters, it only prints 4x6 images. This might be a deal breaker for some, but it is ok for me because that’s all I was needing it for. But the biggest difference with this little printer is that it doesn’t use ink. That’s right, just google Canon Selphy CP1300 ink and you’ll discover that there is none. It uses colored film applied to paper in a four pass process to create you images. And that is the reason I decided to buy this printer!
Let’s talk about the details…
This printer is small. The compact size is nice for transport but you have some removable pieces that have to travel with you. The paper tray detaches and is a little awkward and bulky. It honestly just feels like something I might forget to grab one day. It attaches to the front of the printer pretty easily and in spite of its awkwardness, it does have a really great feature. Once removed, the paper tray actually closes to protect the paper you have loaded. So good job Canon. If you’re gonna make a PITA removable tray, you should at least make it so that it doubles as a paper holder.

You also have to carry something to power the device. There is an optional battery pack, which I did not spring for. The power supply is small enough that it isn’t a huge problem, but just make sure you don’t forget it if you take this printer on the road.
Setting the printer up was easy. Plug in the power supply, snap in the paper tray, and you’re ready to go! I did have to press the power button for what felt like a ridiculously long time before the Canon image appeared on the screen. Not gonna lie, I totally thought the thing was broken because it took so long to power up. The film cartridge loads in from the right side and the paper just slides into the tray. Just in case you didn’t read the instructions, the glossy side of the paper goes up!
Printing to the printer was even easier. Honestly the easiest print experience I have ever had. Using my MacBook Pro 13” M1, I was able to print from both Adobe Lightroom Classic and Capture1 with zero set-up and zero issues. Normally when I print photos, I use my Canon Pro-10 and there are always so many features and settings to adjust. Just having the ability to hit print and it print is pretty nice! We printed several test photos from my phone and iPad Pro and my wife printed several photos also from her devices. There were zero issues on any device. We just hit print and things printed! You can connect via Bluetooth, wifi, Canon Pictbridge or insert an SD card. This little printer has tons of connectivity options that work for almost every situation!
Printing is actually pretty fast. The Selphy CP1300 pulls the paper through and then passes back and forth 4 times. There’s a little color dot on the printer display that tells you what color (Yellow, Magenta, Cyan, and Clear Overcoat) is printing at the moment. The entire process takes around 60 seconds from the time you press the print button until you have a print. The best thing is that there is no wet ink to allow to dry or set. Once the image prints, its done!
Image Quality
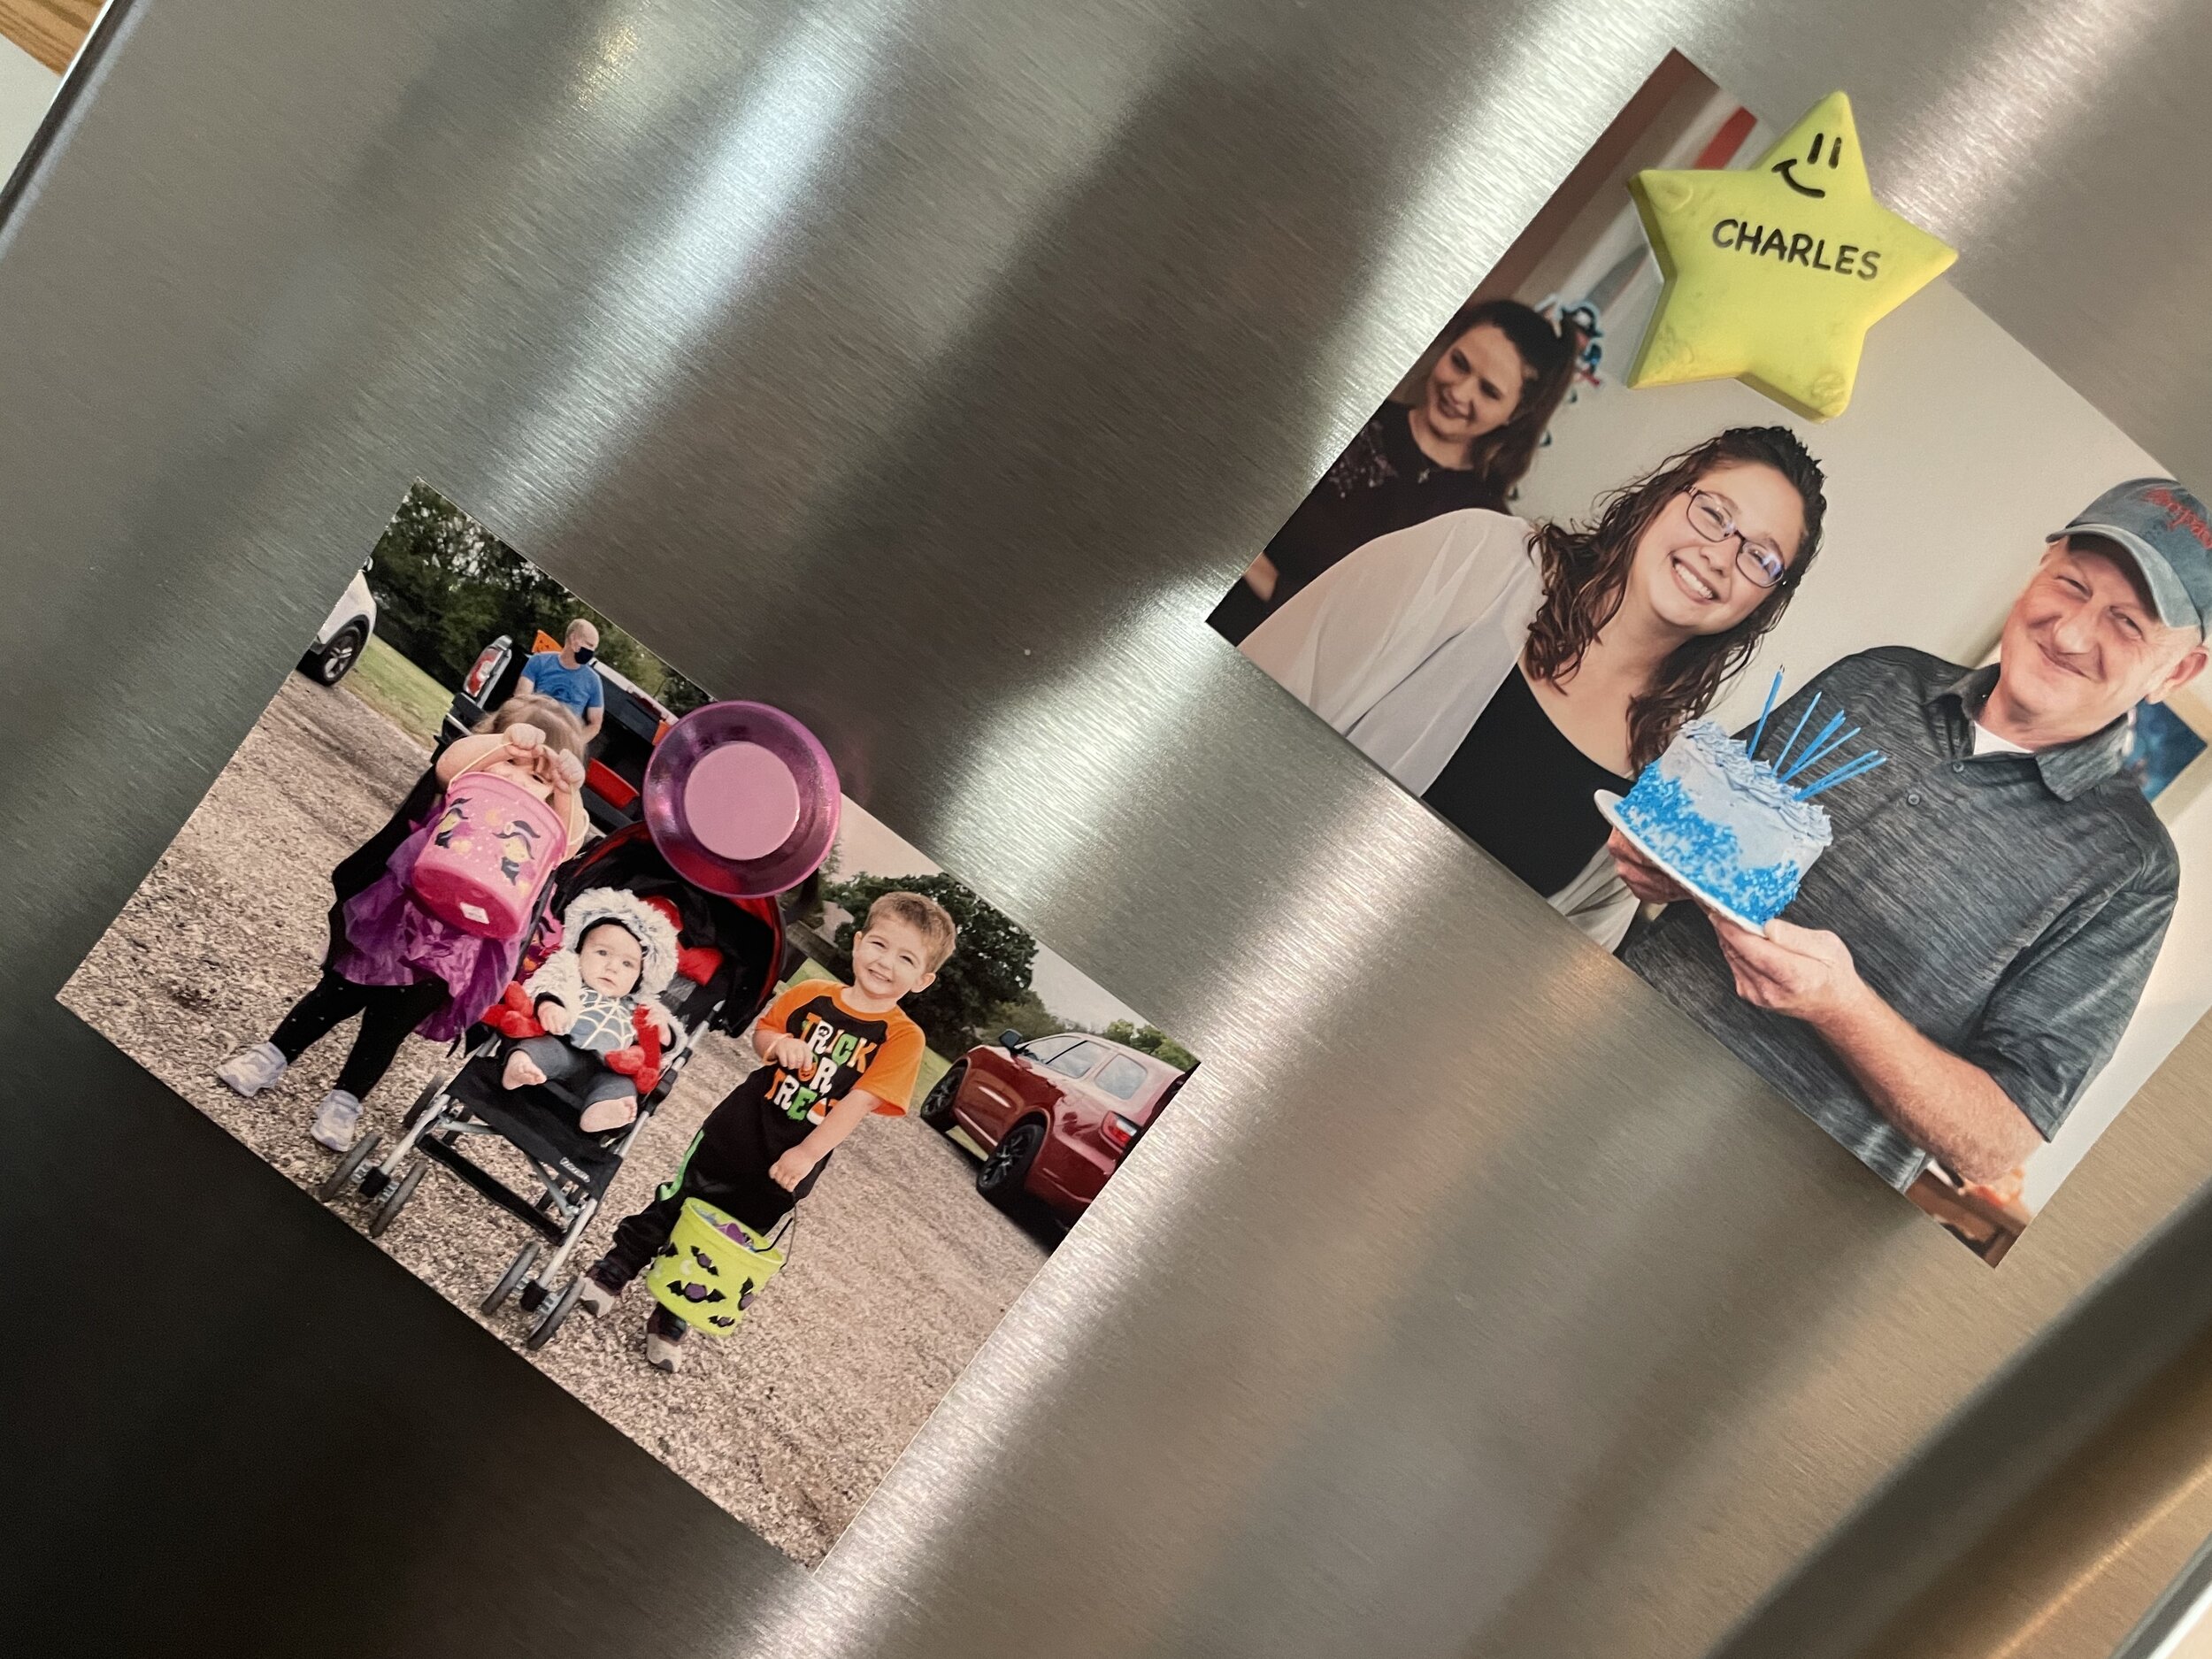
So I’ve used some of these little sublimation printers before. The quality has always been less than good. I had a lot of reservations about buying this printer because of those past experiences. But I was completely shocked at how good the quality was when the first print came out. It looked good. Actually really good! The colors were vibrant and pretty true to accurate. We printed a lot of photos and were really impressed. The skin tones were almost always a little under saturated. Which was disappointing because the skin tones are really important. If you want to take the time to create a variant and over saturate the skin tones the image comes out ok. Don’t get me wrong, its not bad, just a little under saturated.

We also noticed something really strange. With vibrant blue colors, the prints lost LOTS of detail. But it only happened when you had various shades or vibrant blues together. It didn’t happen as noticeably with other colors. In fact, the level of detail and crispness was really good in almost all areas of the photograph. This is the first sublimation printer I have used that actually produces really good prints. I’ve been avoiding this type of printer for a while, but now I’m curious about trying out some higher end printers in this segment.
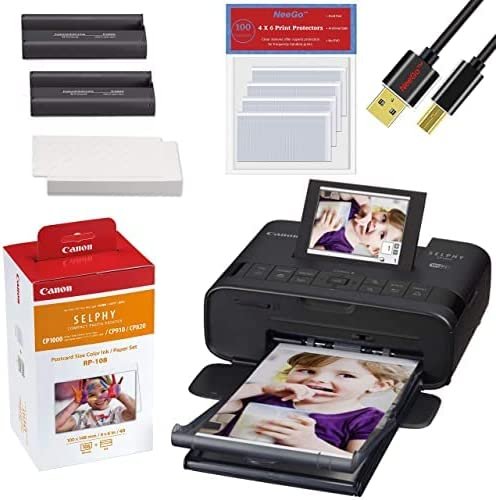
The Paper
The paper for this printer (Canon RP-108) comes in a pack that includes paper and cartridges. You get 108 prints per pack which makes this an affordable method of printing images. The paper is glossy and the finish is actually nice. The paper does have excess tabs on the end that the printer uses to pick up the paper and feed. They are perforated and tear off which is a little bit of a downside but ultimately I decided wasn’t a deal breaker. Buy some Canon RP108 paper and cartridges by clicking HERE!
The Final Verdict
If you’re looking for a printer to keep at home and print images from your phone or something you can take with you and make prints really easily on the fly, this printer is definitely for you. Its affordable, Amazon has them available all the time, the paper/cartridges are affordable too and you never have to worry about your ink trying up or needing to go get a yellow ink cartridge. I’ve put mine through the wringer and it is holding up just fine. I would definitely recommend as a great printer to have around!
Pick one up from Amazon for less that $130! Here’s a link so you can explore and read other reviews!
If you’re interested in checking out the Technical Specifications (aka the Tech Specs ), Here they are!
Printer Type - Compact Photo
PrinterPrinting MethodDye-Sublimation
Features Borderless/Bordered Printing, Brightness Correction, Canon PRINT app1, Color Adjustment, Cropping, Date Print, DPOF8, ID Photo Print, Index Print, Image Optimize (Brightness Correction, Scene Detection), Layout Print (Photo booth (2"x6") Size3, Fixed Size, 1-up/2-up/4-up/8-up/2-up Fixed Size/Index, Party Shuffle1, Shuffle), Mopria Device Printing9, My Colors, PictBridge/Wireless PictBridge10, Portrait Image Optimize, Reprinting, Smooth Skin, Wireless Printing4, Tilting 3.2" LCD Screen, Energy Star® Certified, 17 Language User Interface, Anti-theft Wire Lock Slot, Optional Battery Pack, Power Save, Red-Eye Correction
Print Speed (up to)Postcard Size 4" x 6" Photo5,11: Approx. 47 seconds (Borderless)
Card Size Photo5,11 : Approx. 39 secondsPrint Resolution (Up to)Color256 Levels Per Color (16.8 Million Colors)
OS Compatibility
Windows:12 Windows® 10, Windows 8.1, Windows 7, Windows 7 SP1
Mac:13 Mac OS® X v10.10.x - macOS v10.12 (Sierra)
Mobile Operating Systems:14 iOS®, Android™, Windows 10 Mobile, Amazon Fire devices15
Standard InterfacesWi-Fi® (Wireless LAN, 2.4 GHz, IEEE 802.11b/g)4
Memory Card Slot2
PictBridge (USB) & Wireless PictBridge (Wireless LAN)10
Hi-Speed USB (Cable not included)
USB Flash MemoryInk Droplet SizeDye Based InkPaper SizesPostcard (4.0" x 6.0")
L Size (3.5" x 4.7")
Card Size (2.1" x 3.4")
Square Label (2.1" x 2.1")Output Tray CapacityPaper Tray: 18 Sheets with Postcard Size Paper CassettePhysical Dimensions7.1" (W) x 5.4" (D) x 2.5" (H)Weight1.9 lbs.Warranty1-Year limited warranty with InstantExchange Program. 1-Year toll-free 100% U.S.-based technical phone support.16Software Included
WINDOWS12/MAC13
SELPHY CP1300 Compact Photo Printer Driver
Direct Print Built In Card Reader Functions
Memory Card
SD™, SDHC™, SDXC ™, miniSD™, miniSDHC™, microSD™ ,microSDHC™ and microSDXC™ Memory Cards
Software
WINDOWS12/MAC13
SELPHY CP1300 Compact Photo Printer Driver
MOBILE APP (iOS/Android)
Canon PRINT app1
PRINT LONGEVITY
100 Years Print:
A special coating on each print that protects against splashes, spills, and fading for up to 100 years when stored in an album.
Don't Let Those Photos Die in the Cloud! FreePrints is Your Answer!
I can remember as a little boy, begging my mom to get our family photo albums to look through the images. There were pictures of me and my sister when we were babies, photos of my mom and dad when they were young and in high school. Pictures of family and friends, doing things like having parties, weddings, hanging out and fun at the lake. So many memories and so many stories. When we would got those albums down, mom and dad would share stories and memories and we listened and just absurd every word. Even now, I can look through those images and share the stories exactly as they were told to me.
Growing up, those old images in that album helped me to know who I was and where I came from. They become such an important part of my identity.
But now, everyone has gotten into the habit of NOT PRINTING any images. Even me, someone with a high end photographic printer stopped printing images. The truth is that its just a huge hassle!. Moving the pictures, loading the paper and the ink, ugh it was just too much work. Our pictures were taken and just sat on my cloud storage, never being looked at, just collecting digital dust.

But a few years ago I stumbled upon a really amazing app, one that I love and have been using for several years now. The app is call FreePrints and its available on both iOS and Android. It allows you upload images from your phone to the app and get 85 FREE 4x6 prints every month. You just have to pay for shipping. You can order more that 85 prints in a month, you just have to pay for them. You can also order other sizes, but you pay for those also. But the great thing is that its convenient and the price is really affordable!
Every month, I now sit down and place my order, wait a week and then load all of the images, which come printed with the date the image was taken on the back (an amazing feature btw) and load them into our photo albums. It is such a simple process, I honestly cannot recommend the app enough.
They also have a family of other apps that allow you to get all sorts of things printed. Its such a simple and affordable process, I couldn’t believe how easy it was.
FreePrints isn’t paying me anything to write this - its just an amazing app and ultimately, I want everyone to start printing their photos again. There’s just something about physical prints that convey more significance that just pixels on a screen. I know that they were so very important to me, and so many others.
For iOS users, CLICK HERE TO GET THE APP
Android Users, CLICK HERE TO GET THE APP